Do you need to add new dates or change your availability? Whether that's adding extra time slots or changing existing ones, you can find all the information needed in this short guide.
Adding New Dates
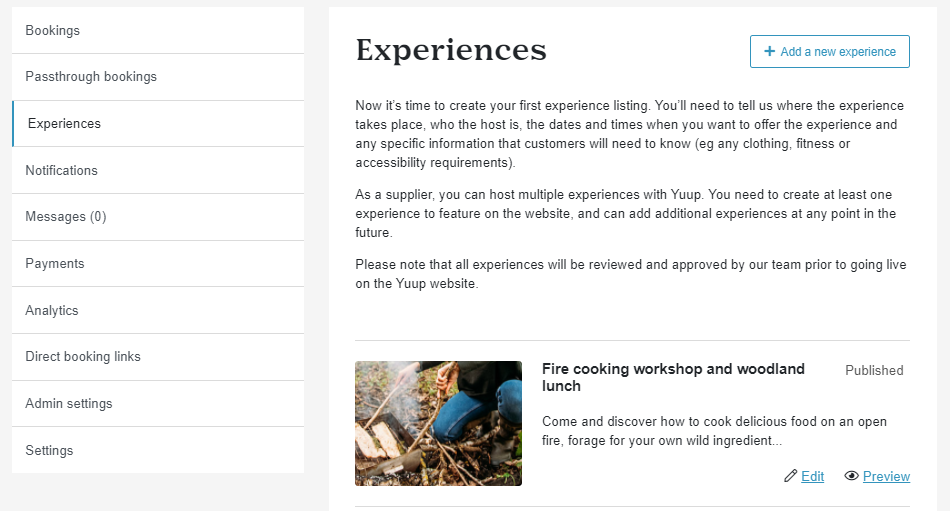
Click the Experiences tab on the Dashboard. Then click Edit on the experience you wish to add dates to.
On the experience’s page, select Availability along the top row. Then at the bottom of this page you'll find the option to Add a date.
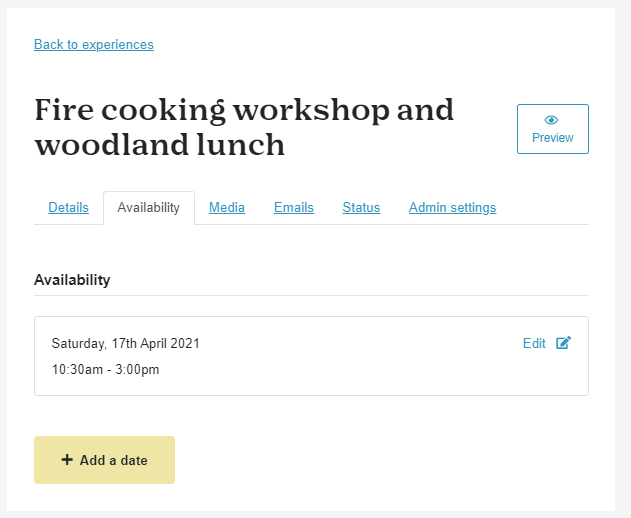
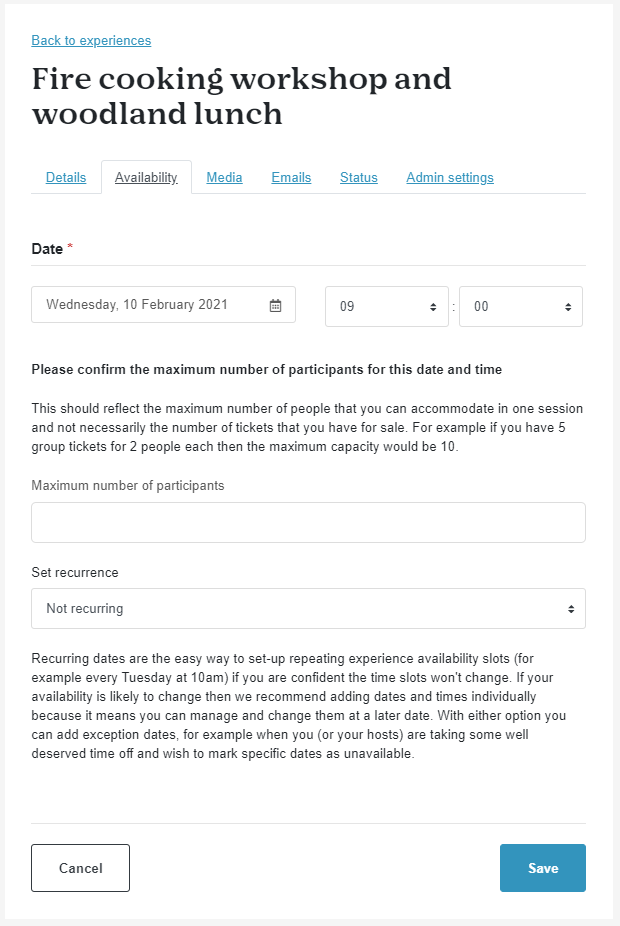
You’ll then be able to add a date, start time and max. number of people for that date. The experience length is already set in the Details tab.
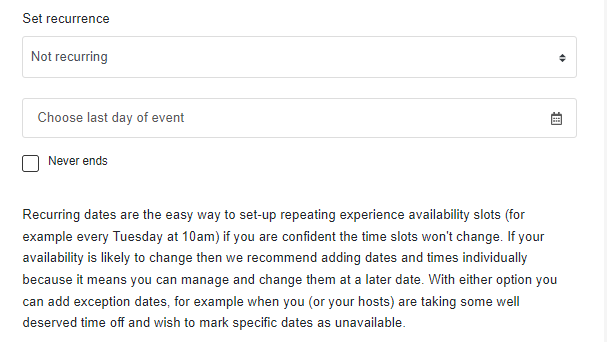
Recurring dates
If you host your experiences regularly, you can choose to set your date as recurring. This will allow the date you’ve added for the experience to be repeated on a daily, weekly, monthly or yearly basis. There’s also the option to choose the last day of the event, which will stop the experience from recurring once it has reached that date.
You can choose to make an experience recurring when setting up a new date. After choosing to add a new date you'll find the option to Set recurrence. Please note that the Start Time you set for the experience will be the same across the recurring dates. If there is more than one timeslot that is recurring, then this will need to be set up as a separate recurring date in the Availability tab.
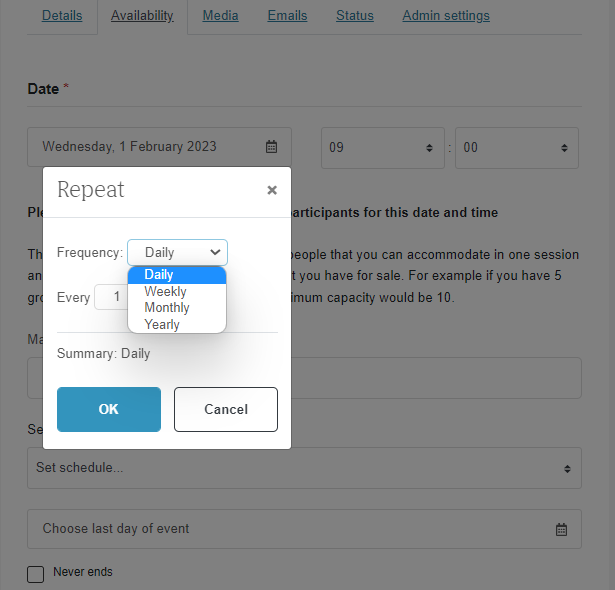
If the experience is only recurring for a set period of time, you should choose the last day of the event underneath where you set the recurrence.
If there are dates your experience doesn't take place on (bank holidays, time off etc.) you can add those in as Exception Dates.
Exception Dates
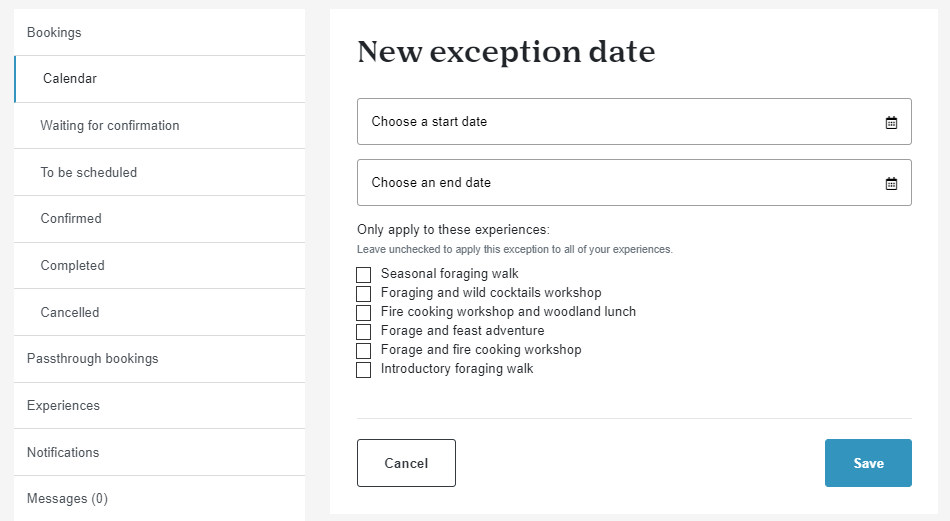
If you’re looking at taking a break or are unavailable for a day, week or month, you can use exception dates to block out your availability. You can select a certain date or a group of dates to be removed from your schedule, without affecting all the other recurring dates. To do this, go to the Bookings tab and select the Calendar from the drop-down menu. Under the Calendar, you’ll see the exception dates section, where you can click to add a new exception date.
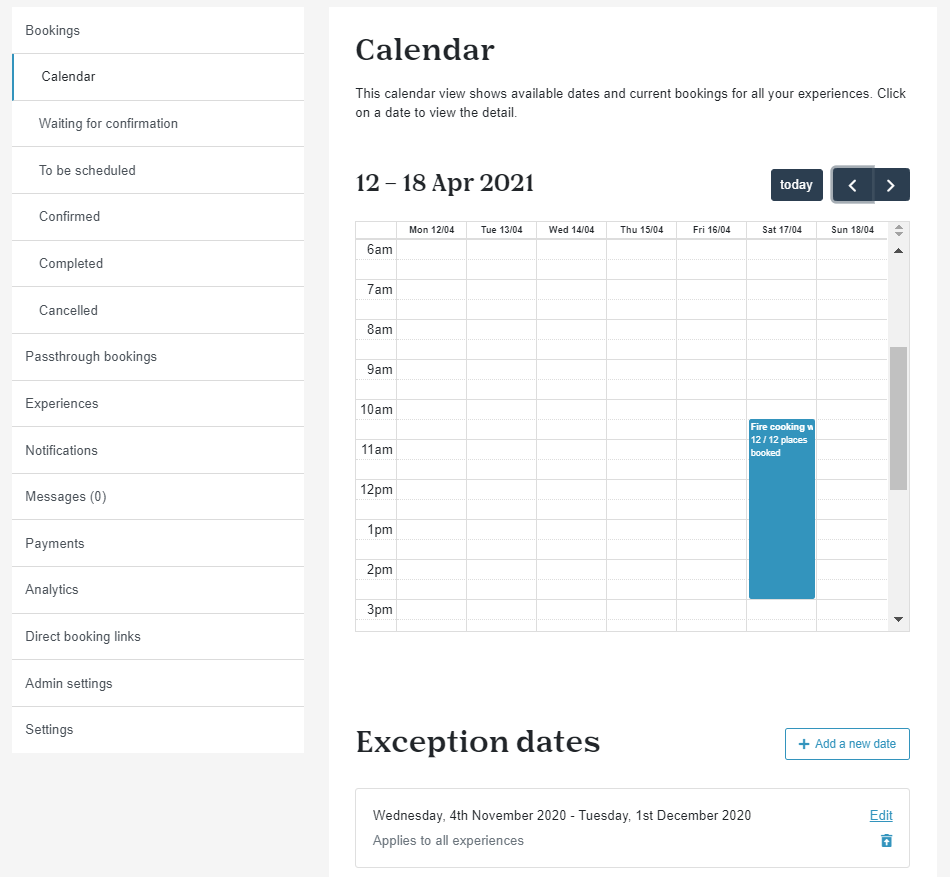
You’ll then be taken to the new exception date page where you can choose the dates you'd like to mark as unavailable and how long you'd like your break to last for. You can apply your exception dates to specific experiences by ticking them on the new exception date page, or have the exception dates apply to all of your experiences by leaving the boxes unchecked. Once this is saved, any experiences within your exception window will be removed from the live Yuup platform and calendar view.
Please, make sure to check if there are any existing bookings already scheduled for any of your exception dates before adding in the exception. If there are bookings scheduled, make sure to suggest new time slots to customers.
Offline Bookings
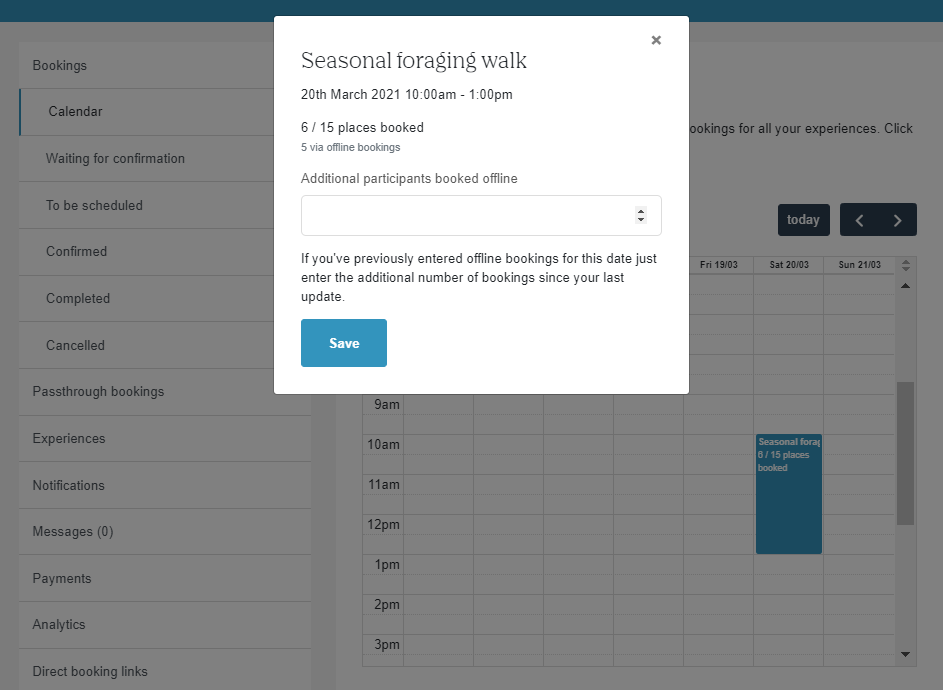
If you have other platforms through which you take bookings, you can update your Yuup inventory accordingly using Offline bookings. This is done by going to the Bookings tab and selecting Calendar from the list of options. You must then find the experience and date that you wish to add offline bookings to. The experience will show up in blue and note how many places have currently been booked on Yuup.
Click on the experience in the calendar and underneath the option to View Bookings (if there are any) you will see the option to Add Offline Booking. It will also show how many offline bookings there currently are for this experience on a specific date.
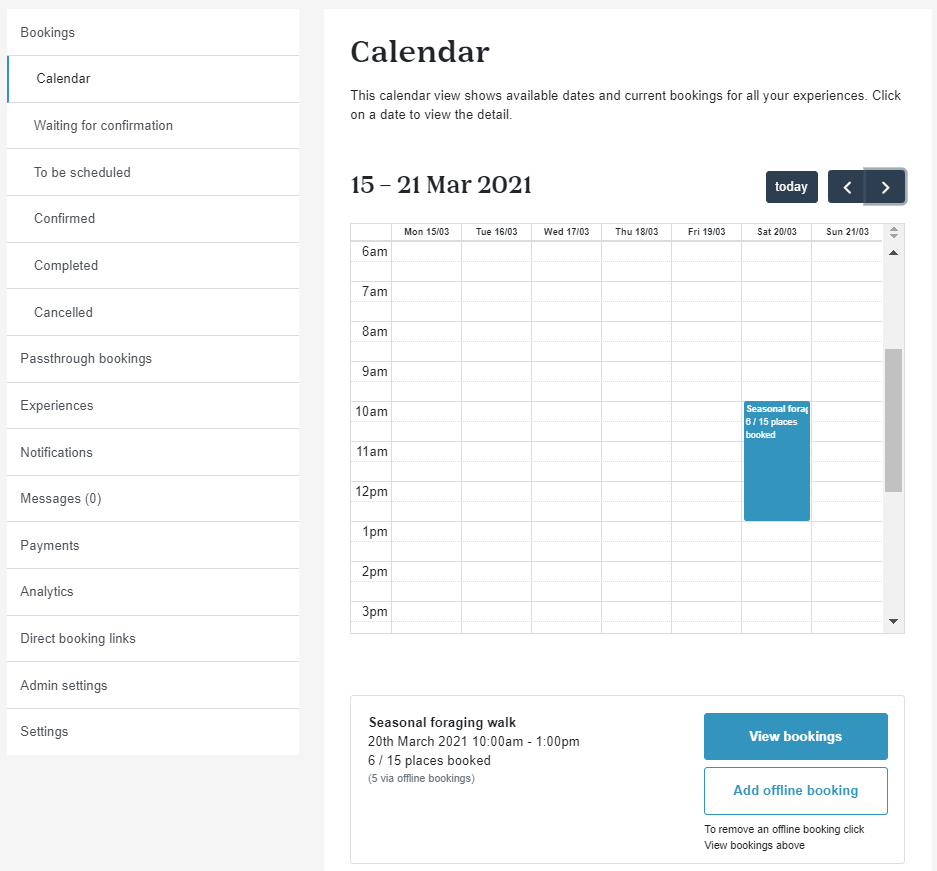
Selecting Add Offline Booking will trigger a pop-up which will ask how many tickets have been sold offline/through non-Yuup platforms. Once you have entered the number of places filled, they will be removed from your Yuup inventory.
You can remove Offline bookings through the same process, but by selecting View Bookings instead of Add Offline Booking. At this point, you will be taken to a new page with an overview of your bookings for this experience slot. Alongside your Offline bookings is the option to Delete them.
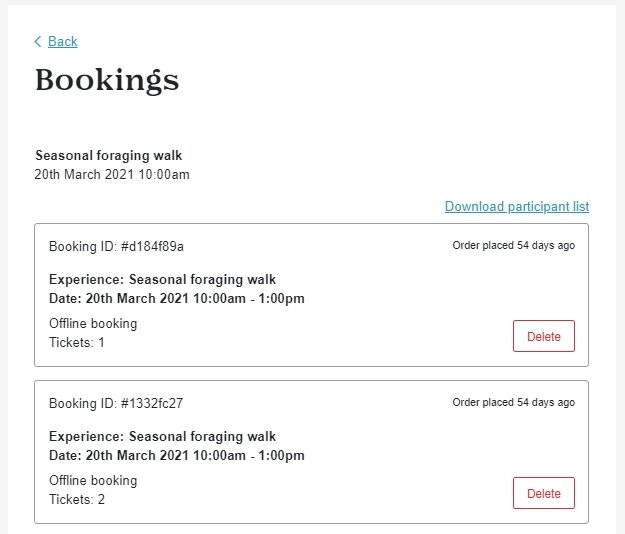
This overview of both Yuup and Offline bookings can also be found by finding the relevant experience, date and timeslot in the Confirmed bookings tab in the menu.