
Welcome to the Yuup platform! We’re so excited to have you onboard and to start this journey with you. Below is a comprehensive guide on completing your account so that it can be published on the Yuup website.
Should you have any questions, please do not hesitate to contact a member of our team via hello@yuup.co
Getting Started
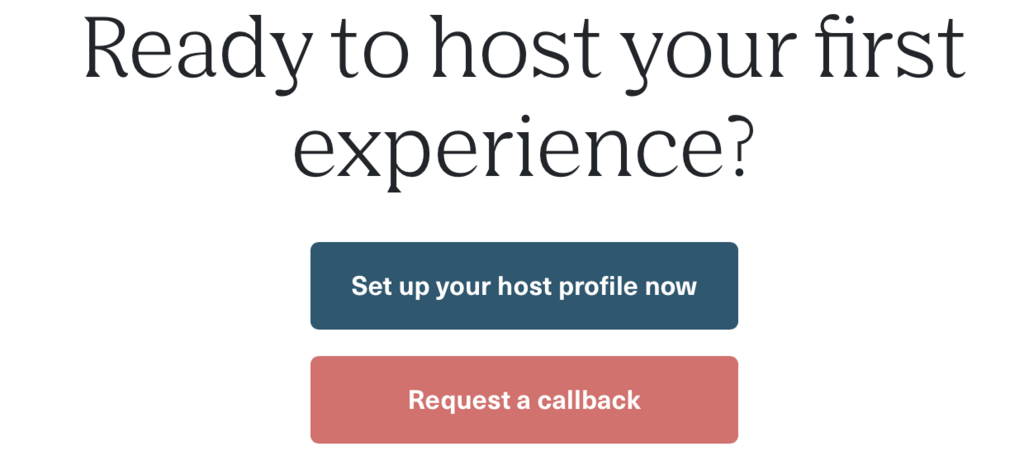
To sign up as a Yuup host, you will need to click on Host an experience at the top of our homepage and scroll down to select Set up your host profile now.
You will be asked to log in or sign up to Yuup. Enter your name, email address, and a password, then read the terms of service and privacy policy before clicking Sign up.
You will be directed to a form where you will need to fill in information about yourself and your business.
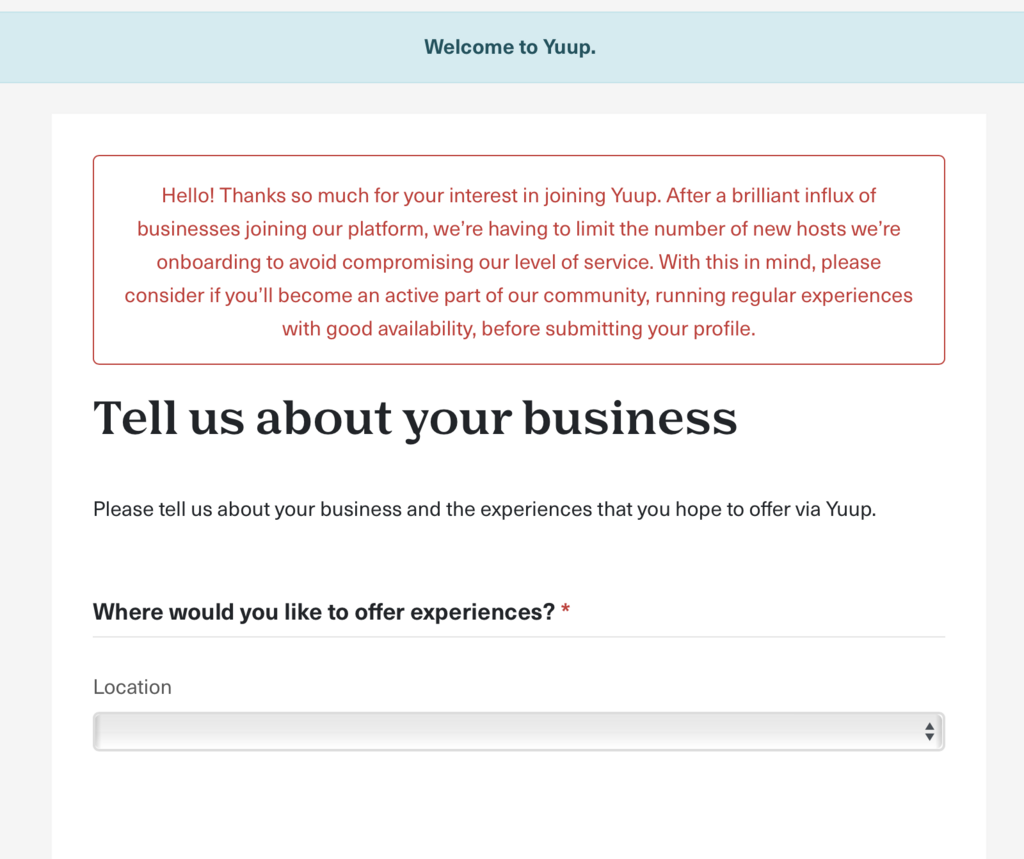
This page will ask for basic information such as your business name, contact email and phone number, business address, and the city in which you are trading.
The phone number and email address you enter in this Business Profile are for Yuup’s reference only, and will not be used to send you notifications on bookings (unless they are the same as the details entered in the Your Account tab). Likewise, the business address will not be displayed as the location of the experience, but it will show on customer invoices as the registered business address.
Work your way through the form entering as much information as possible. If you are a sole trader, you don't need to enter an 8-digit Company Registration Number.
The text that you enter beneath the Tell us about your business header, will be used as your business description on your Yuup host profile (as shown below) as well as on your experience pages. This will be seen by Yuup customers and gives you the opportunity to tell them more about you, your business, and what you're offering through Yuup! This is the only part of your Business Profile that will be made public on the Yuup website. Please note that this description should be a brief overview of your business and not a detailed description of your Yuup experience/s (there will be space for this later!)
Your profile can be edited and updated at any time by clicking on the Business Profile tab once you’re logged into the host portal.
Terms & Conditions
After completing your Business Profile you will be directed to your host portal. You will arrive on the Terms & Conditions tab.
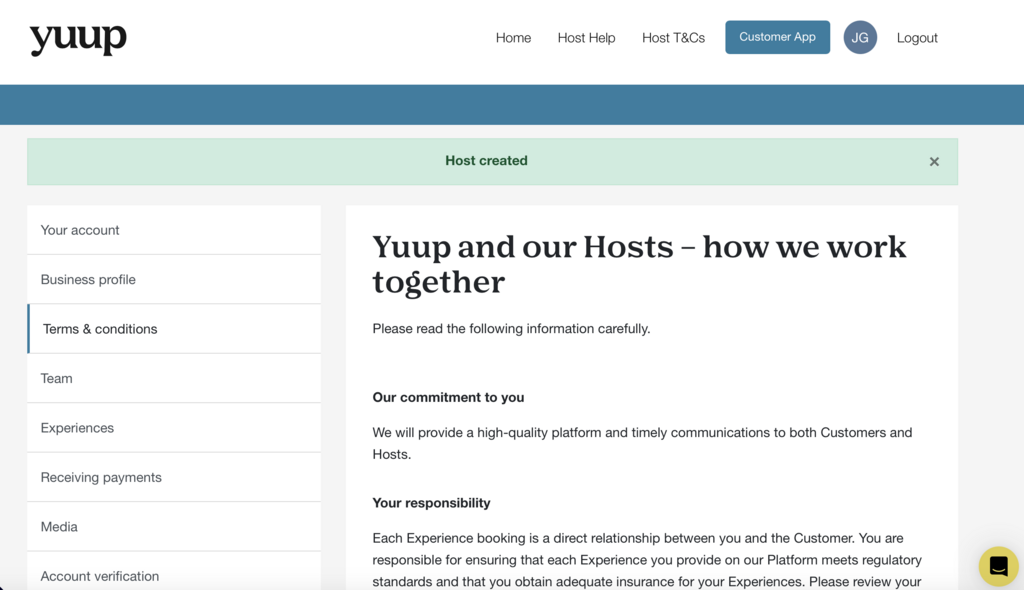
Please read this section carefully and contact the Yuup team if you have any questions before accepting.
The Terms & Conditions will outline key information, including:
- Your responsibility as a Yuup host in organising insurance for experiences and reporting taxes/VAT.
- Pricing and Yuup’s commission structure.
- Confirming customer bookings in a timely manner.
- The need to ensure that your listing on Yuup is accurate in its description of the event and available spaces displayed to customers.
- When to expect payment from Yuup.
- Yuup’s policy regarding gift bookings and ‘schedule later’ orders.
- Policy regarding cancellations and rescheduled bookings.
- The customer disputes and complaints process.
These are the terms and conditions that you must adhere to as a Yuup host. There are separate Participant Terms & Conditions for Yuup customers, which you will be able to read when you set up experiences. You are also able to load your own Participant Terms & Conditions for your experiences.
To accept the Terms & Conditions tick accept at the bottom of the page and click Continue.
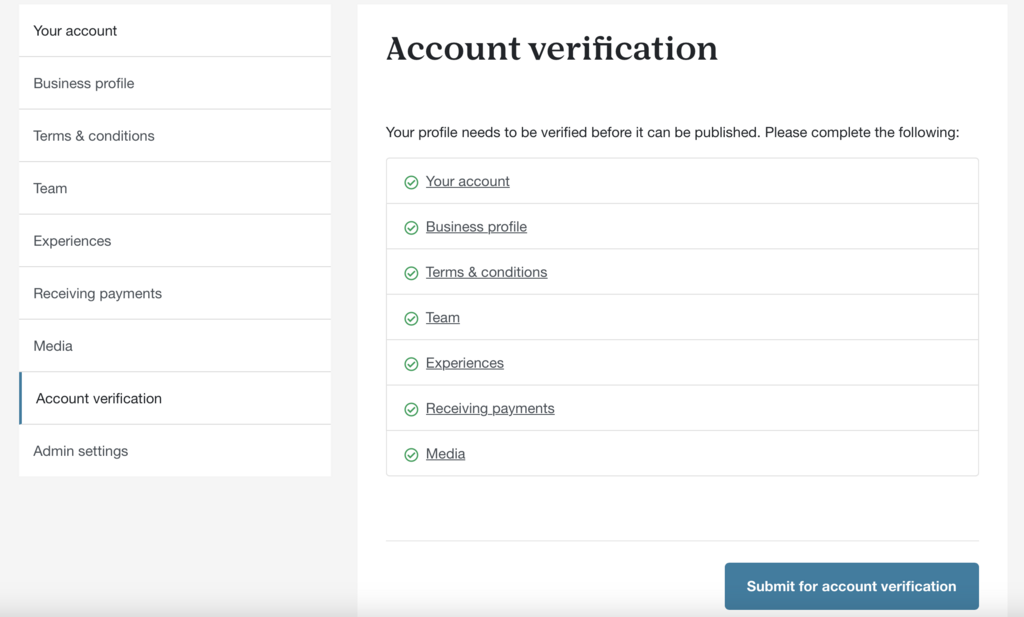
Account Verification
You will now be logged into your host portal and should see a checklist of things to complete on your account. Every checklist item must be completed before your profile can be published.
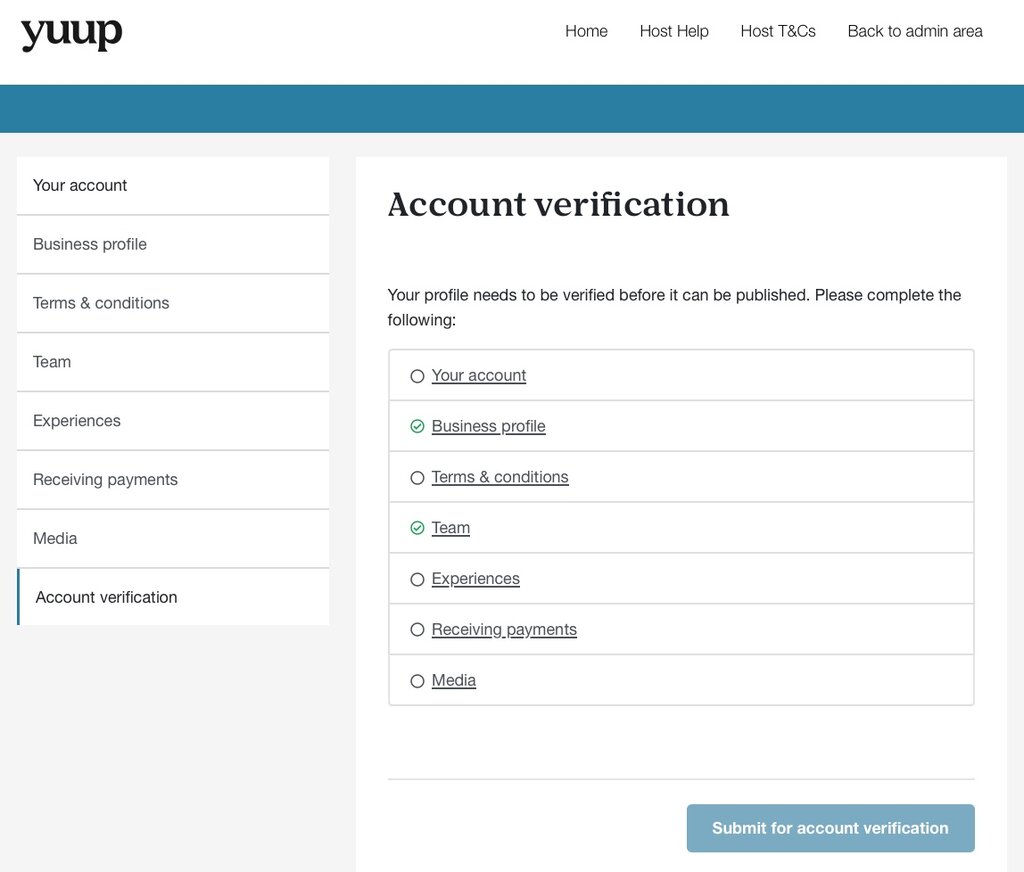
Once you've completed everything on the list, you will be able to Submit for account verification. This sends your profile to our Content Team, who will review it before it goes live on the Yuup website.
Your Account
On the first tab, Your Account, you will be able to view and change your password and user details. You will need to verify your mobile number and complete the two-factor authentification to complete this section.
Verify your mobile number:
To start, select Verify my phone now.
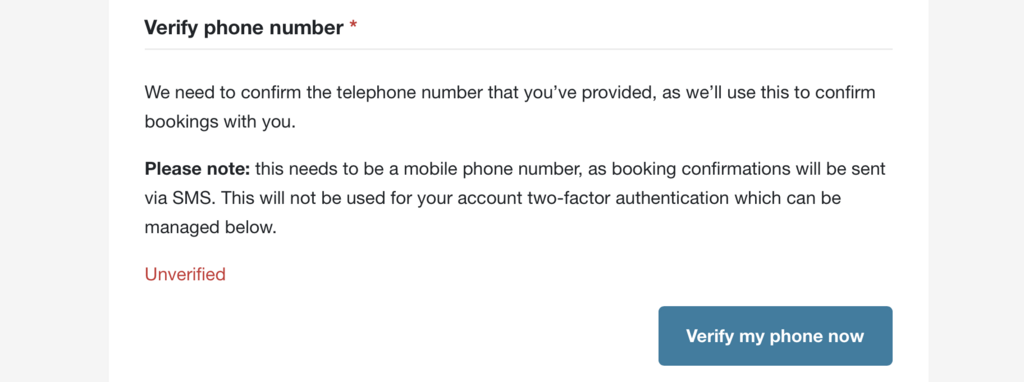
You will be asked to enter a phone number and should click Verify now once this is done. Yuup will use this phone number to send you text confirmations and updates about your bookings.
You will then be sent a code via SMS that you will need to enter in order to complete the verification process.
Two-factor authentification:
Beneath Verify your phone number, you will see a section titled Two-factor authentification, with the option to Set up two-factor authentification now.
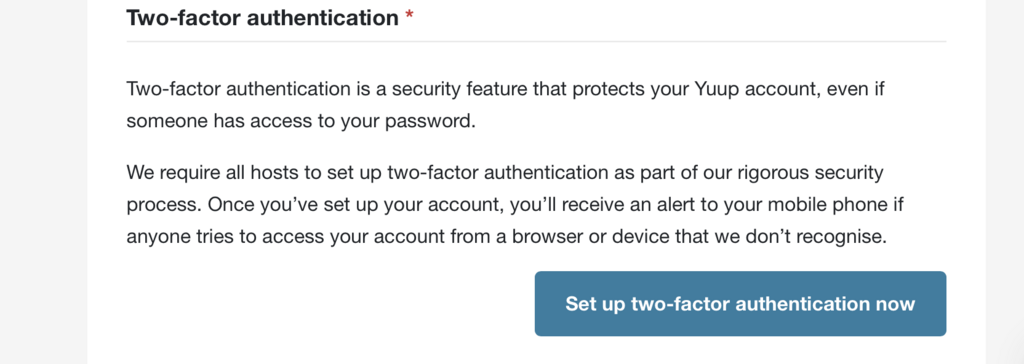
Click this button and you will be asked to enter your phone number. You will then be given a QR code that must be scanned with a QR code reader app. After scanning, your app will generate a code for you to enter on the page. If you don't have a QR code reader app, you can choose to request a code via SMS instead.
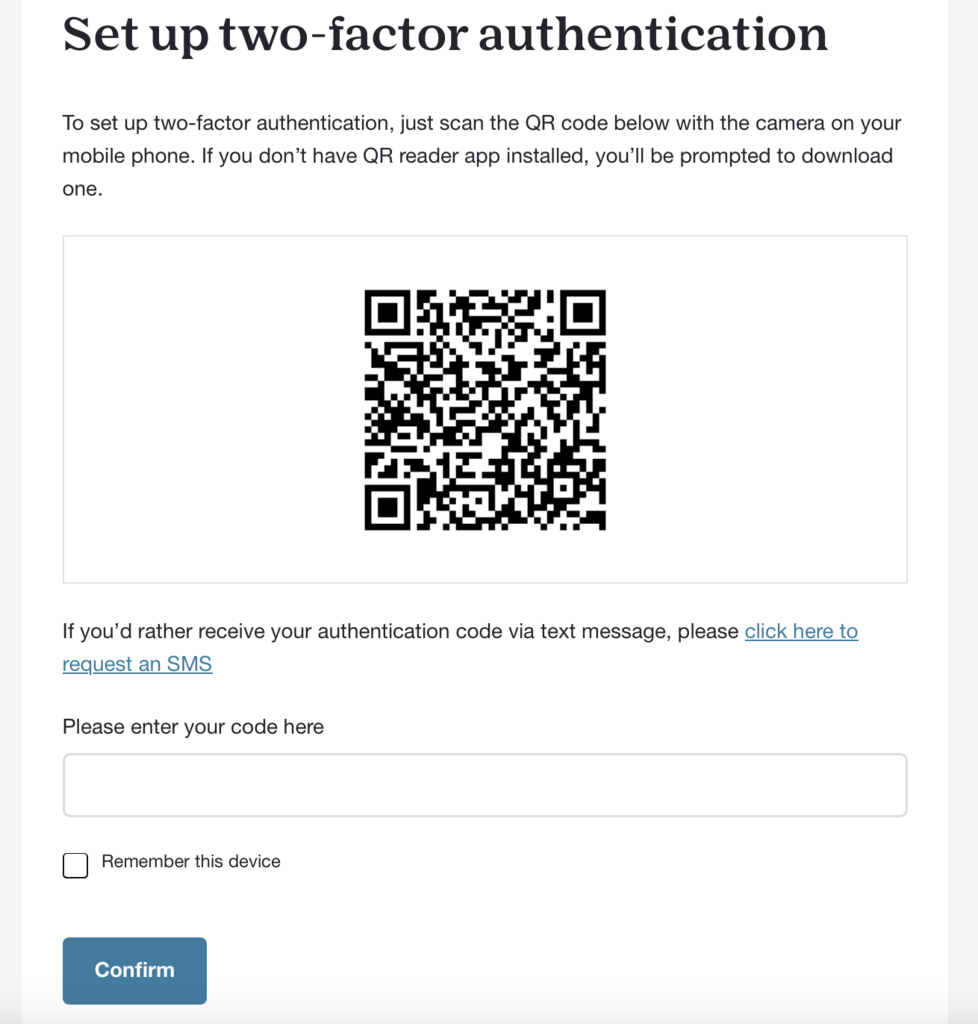
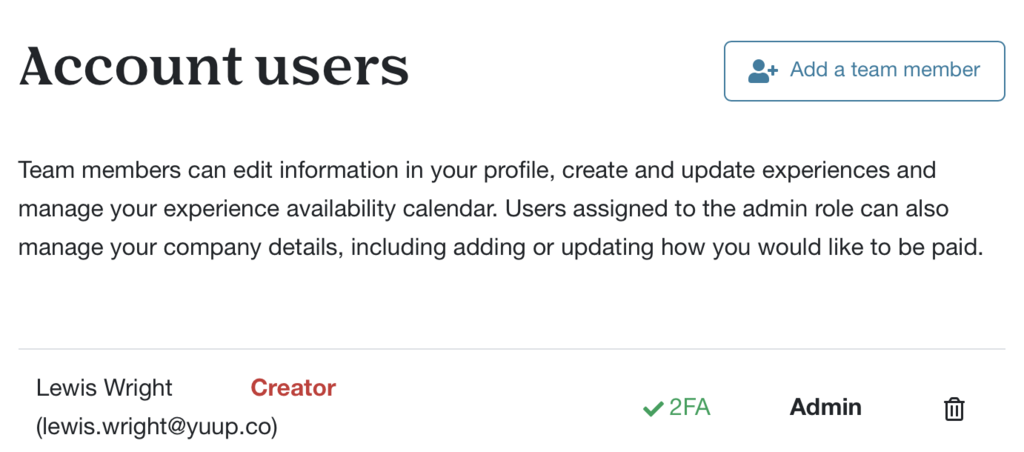
Once the code is entered and you've clicked Confirm, the two-factor authentication will be complete. On the Team tab, 2FA will appear next to the admin’s email address and name. It will appear in red with a cross if the two-factor authentification has not been completed, and in green with a tick if it has. Each new team member that you add to your Yuup host account will need to verify their phone number and complete the two-factor authentification.
Having verified your phone number and completed the two-factor authentification, a tick should now appear next to Your Account and Team on the Account Verification checklist.
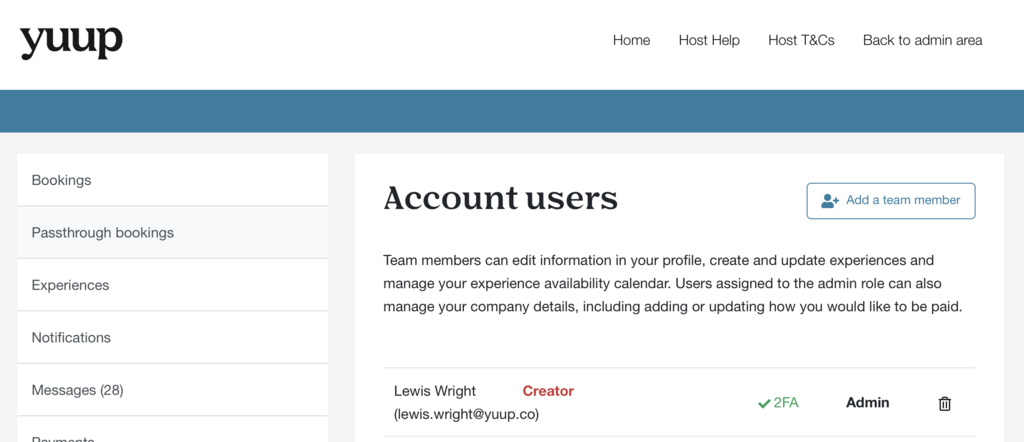
Team
Account users
The Team tab displays every user who has access to your Yuup host account. There are two types of users: Admins and Team Members. Admins have full control of the account, whereas Team Members have limited abilities and cannot access payment details, edit confirmed bookings, and do not receive new booking notifications.
All Admins (regardless of how many are on the account) will receive both mobile and email notifications when customer bookings are made. Admins can add a new user by clicking Add a team member and can choose to invite them as either an Admin or Team Member.
When adding a new user, an email is sent to the address of the invitee. The invitee will be given a link to follow and be asked to set up their Yuup account before being given access to the host account.
Please note that if the invitee already has an existing Yuup account, they will need to log in rather than sign up after following the link. The Yuup website will not allow a user to sign up under an email address which already has an existing account.
Users can be removed from your host account by using the bin icon to the right of their name and email address. The green tick next to a user’s name shows that they have completed the two-factor authentication (see Your Account section above for instructions on how to do this).
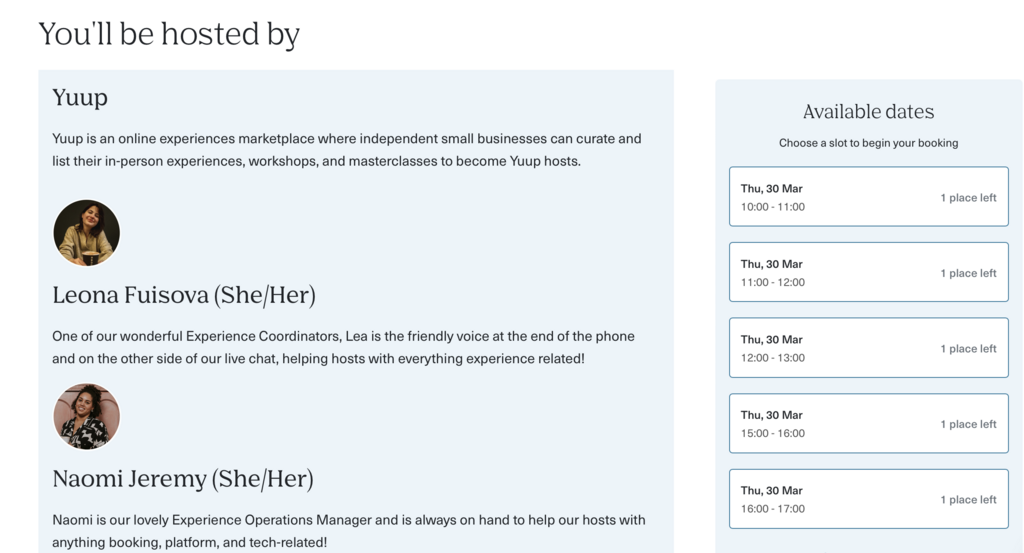
Experience Hosts
You can personalise your experiences by adding Experience Hosts under the Team tab. You will be asked to enter the host's name and a short bio, along with a picture.
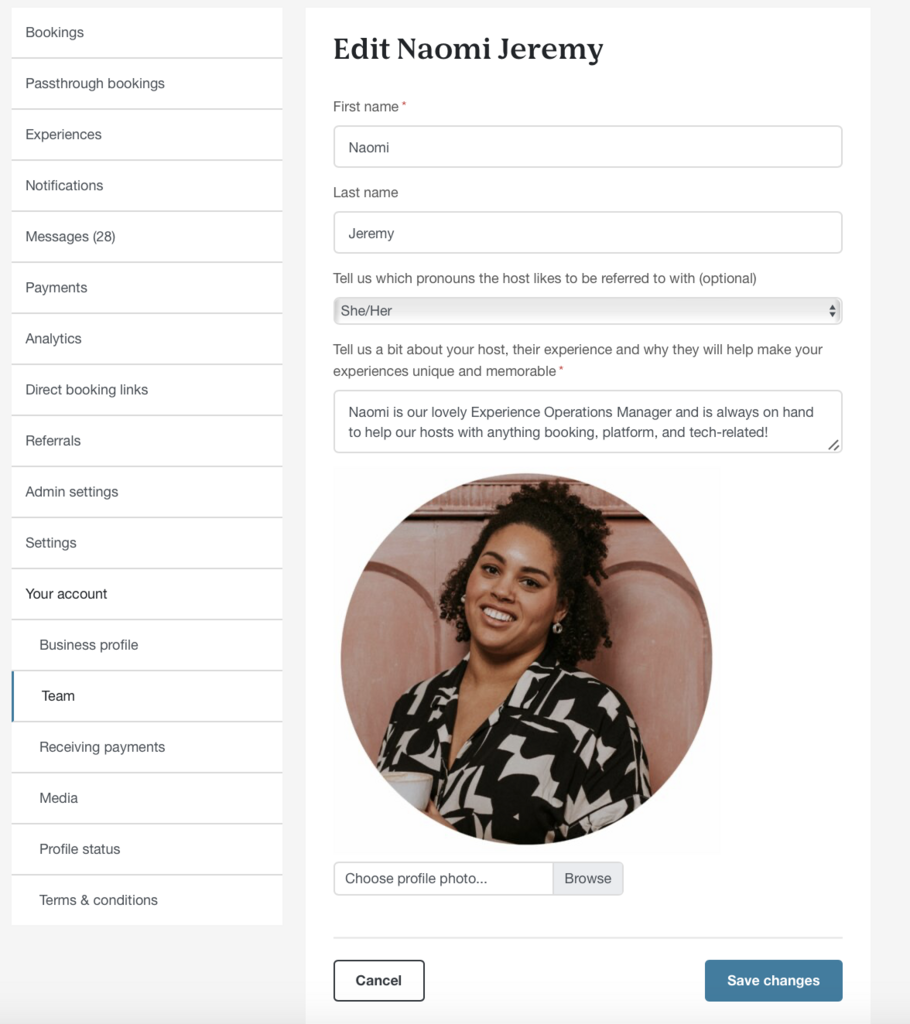
Host bios will appear at the bottom of your experience page, underneath your business description (as shown in the example below). This allows Yuup customers to see who will be hosting the experience and learn a bit more about the people behind the business!
Adding Experience Hosts is not compulsory but it adds a friendly and personable quality to your experiences. There is no limit on how many Experience Hosts you can add, and they do not need to be registered users on your account, so feel free to add in your teammates and collaborators too!
Receiving Payments
You will need to enter your bank details so that Yuup can transfer your payments for any completed bookings.
Please select bank transfer from the dropdown menu and enter the details of the account you would like Yuup to pay into. If you experience any issues please contact us via hello@yuup.co
Media
You will need to upload a photo to the Media tab, which will act as the banner image for your host profile page. The image below shows what this will look like on the website.
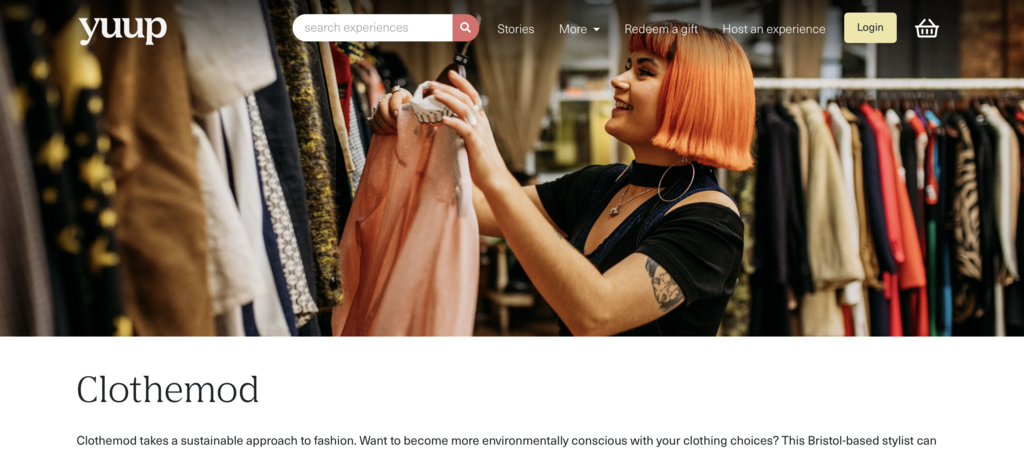
Your Media photo must be at least 1920px wide x 1080px high, however, the ideal proportion is 3840px x 2160px. The file size must also be no larger than 4MB. If your picture does not meet these proportions, the website will not accept it. Please contact us if you need any help resizing your photo.
Please refer to our video on the Media tab for tips on what sort of photo to upload. An engaging, landscape picture showing an experience in action is perfect! Venue, product or team photos may be permitted depending on the quality. We cannot accept logos, posters, graphics, or low-quality images.
Account Verification: Completed!
Everything on your checklist should now be complete and your profile is ready to submit! All that's left to do is click Submit for verification on the Account verification tab.
Once you have submitted your account, it will come through to our team who will review and copy-edit it before it goes live on our website.
You will not be able to make any edits to your account whilst it's being reviewed. Should you wish to make any changes after submitting, please contact us via email or live chat.
We review and publish new hosts as quickly as possible, but as a small team sometimes it takes a little time for us to do this. Please bear this in mind when submitting your host account.
If we have any questions about your experiences or if anything is missing from your account, we'll be in touch to discuss this with you before publishing your profile.
Once your account has been reviewed and published, you will be notified via email and your profile will be live on the website! Now it's time to get your experiences loaded!

